Showing posts with label DIY. Show all posts

DIY: Getting rid of that spot overnight!

Wednesday, 10 October 2012


You guys might be wondering how is it possible to get rid of a pimple overnight with things that you usually find in your kitchen.. Well I assure you its 100% Possible and Natural.. This is an ancient Indian Recipe which was lost through centuries.. 


I found this recipe on the internet and decided that I'd give it a go.  It works very effectively on my skin.. Now I don't guarantee it will work on Everyone because everyone has different types of skin. So lets get started..

You Need:

Honey
Cinnamon Powder


Be sure that you are not allergic to Cinnamon so test it before use. It might feel a little itchy in the start but that's how it works. You will find it in any grocery stores.


Directions:
Take 1 tsp of honey and a pinch of cinnamon powder. Mix it well and apply it directly on the pimple. Leave it over night. I know its sticky and yucky but trust me ITS WORTH IT.

This is a great little remedy and I'm definitely going to be looking for more natural remedies for my spots.  Hope this works for you as well!

xoxo,
Angelique

Bedroom Rennovations part two

Monday, 8 October 2012

Goood morning everyone!

I'm loving this slightly eerie feel that the weather has taken, being a little bit more  foggy and chilly outside!  It reminds me that my favourite times of the year are about with Halloween, Bonfire Night and Christmas and New Years!  I've been planning some great little treats and can't wait to share.

However, in the meantime I'm decorating my bedroom and this is sharing the next phase of the redecorating with you guys today. 

So let me talk you through to where we've got to....

We finished glossing our skirting boards and the final product looks magnificent!  They are gleaming and glossy and white.  We then decided to start doing the wallpapering.  I previously explained briefly that we'd be lining our wall doubley because they aren't very straight and we completed this process in our living room and hallway and got great results.

We lined with the 1000 grade paper (that we bought from Wickes) firstly in a horizontal manner.  So instead of running from ceiling to floor, we ran the paper from wall to wall (i.e. left to right).  This means that when we layer the 1400 grade thicker lining paper over the top, it doesn't leave any unsightly lines underneath.  The finish is smooth and  flawless. 

I can honestly say that this part of the process is my LEAST favourite and I absolutely cannot get along with stupid wallpapering.  My husband and I have been bickering all weekend trying to finish the paper, however it was only last night that we decided enough.  We haven't finished putting the final layer of paper up on the one side of the room and decided to get some professionals in.  We're getting a real good deal because of having a professional as a family friend.  So as soon as it is done on tuesday, I'll show you the final product.

Some pics....

The finished and double lined wall to the side

On this wall we've only done the first layer of lining and it is awaiting the second coat of lining

We've cut a small star-shaped hole for our socket wires and we'll enlarge this hole only slightly before placing the socket cover over it.

This is a socket with cover on already that also has this small star-shaped hole and this won't have to be enlarged as it allows enough space for the wires to sit freely and unencumbered.

Then on to the next part...the accent wall's paper: 

We decided on liking two different prints so we got two small pieces to compare and decide what we liked best.

This was the first paper...we decided that this would be too dark.

This is the second paper...we really liked this classic design. 

The two papers next to each other

This is the paper against our wall


Both the papers in our bedroom

This paper has a slight sheen in the white, we really like it and decided that this will be the one.

We've bought two rolls from our local Leekes store in Coventry, it was £23.99 per roll


We've been eyeing up these two colours of paint for our bedroom, we've decided they are both too dark and won't match the paper.  It is a no go, back to the drawingboard.

Close up of the sheen in our paper


These two colours looked great but it is too dark

The top colour is called Dusted Fondant and the bottom 'grey' colour is called Pressed Thistle ( both are Dulux paints)

Dusted Fondant

Pressed Thistle

Just a last picture of a bit of gorgeousness in Leekes, I love the crytal accessories and the guilded table. 

So basically I've decided whites, silver and greys will play a large part of my colour pallette, but I'll bring colour in with my accessories and stuff.

Let me know what you guys think of this... and if you have ideas for paint, I'd be delighted to hear it.

xoxo,
Angelique

Bedroom Renovations

Wednesday, 26 September 2012

Hi everyone!

Boy, what a day!  I'm really sorry for not managing to post early this morning as per usual, but I've been having real issues trying to upload my pictures of the rennovation of our bedroom. 

Finally I've got a decent connection and can add all my little pictures.  So exciting.

So here is where we've got to so far:

Firstly we ripped out the old cupboards firstly, they were horribly old fashioned.  Unfortunately I forgot to take pictures of the old cupboards, but managed to get pictures of the new wardrobes, which I'll talk about in more detail next week.

We had our ceiling skimmed by a plasterer, and then painted it white with matt emulsion by Dulux.  This brought the old carpet into question, and we ended up ripping that bad boy out.  It was horrible and stained from years of neglect!  So it took quite a few trips to the rubbish tip to get rid of all the underlay, carpet, old wardrobe (mainly chipboard) and all the grippers.  We also removed the skirting boards and in certain areas had to remove the lining paper.

Basically our bedroom has a few walls that aren't extremely level or straight for that matter, and some of the walls aren't beautifully flat and flawless.  This made us decorate all the walls with a double-layer wall paper design.  We initially horizontally papered the walls with a standard 1000 grade lining paper, and then went over this lining with vertical strips of 1400 grade paper which is much thicker.  This gives you a wonderful surface to work on and paint on.

We haven't finished all the wallpaper lining but will endevour to finish that by this or next weekend.  Primarily all the work is undertaken on weekends and the progress is slow.  BUT this past weekend we went to our local timber yard and bought our new skirting boards.  They were much cheaper than the DIY stores like Homebase and B&Q. 

My husband took the correct measurements and cut the wood to fit perfectly in the gap.  He then drilled holes in strategic areas and screwed the board to the wall.  In the corners we had to make a slanted cut for the boards to create a corner and it can be pretty tricky.  If you want more info on this just email me or leave a comment.  The drilled holes were then filled in with a generic filler, and sanded down to smoothness once dried.  Then we corked around the upper edge where the skirting meets the wall.  Corking is a white substance that looks like filler or silicone in a bottle, it is purely decorative really and gives the skirting a beautiful look to just finish off the skirtings. 

The skirtings were then painted with a wood undercoat, sanded down and glossed with white gloss from Dulux. 

SOOO, with all that being said we've still got to do the last bit of lining wall paper, the wall paper for the back "feature" wall, and buy a carpet.  We bought our light fitting from B&Q for approximately £40, and decided that this fitting would be perfect because it doesn't dangle from the ceiling (it is fairly low and we'd hit out head) and it has 12V Halogen bulbs in and this means it is cheaper to run than the normal bulbs. 

Join me next week to discuss the next steps and then the fun bit of decoration and furnishings :)

This is what our room looks like at the moment, note we've fitted the new wardrobe (Ikea) and the skirtings.

Here you can see the area where we'd like to make a feature wall.

This shows the area where we've had to create a corner and had to cut the skirtings in a slanted manner.  Also notice the corking at the top of the skirting (meeting the wall).  It ensures that there is no gaps between the skirting and the wall.

Corking up close.  Sorry about the yucky floor :)

This is the PAX wardrobe we chose from IKEA which is 3 metres long and includes glass doors.  More to follow on this shortly.  You can also notice our overloaded pasting table hehe.

This is a look at our very smooth ceiling (which was previously artexed) with our new light fitting.

This is the spiral light fitting that we chose from B&Q for approximately £40.


Just a random shot of the room.


This is the Satinwood Gloss that we used on our skirting boards.

We used this Dulux Undercoat in white (this is oil based).

Haha, sorry that this is upside down but I couldn't get it the right side up.  This is the 1000 grade lining paper that we bought from Wickes for £7.99 for 40m.  Good bargain.

This is the more expensive Red Label 1400 grade lining paper (unsure of price but will let you know soon). This gives a brilliant finish and is great for your paint.

Unfortunately on this spot the plaster had blown, so my husband chipped it off and filled the spot in with Pollyfiller.  I wouldn't recommend this method as the best finish is without a doubt browning and plaster.  He was lazy though :)

We noticed after removing the window dressings that our window wasn't sealed properly and my husband strategically placed foam into the gaps, cut the extra off and filled any holes with browning and plaster.  This made a huge difference and the room is warmer now.

That is an example of the browning he used to fill the gap around the window.

My husband removed the plug socket as it was in the way of the new skirting board.  The old skirting board was slightly shorter.  We'll keep the plug socket off until we've finished the papering.  I'll be showing you how to paper around a plug socket soon.

Sorry that this was such a long post with loads of pictures but I've had to explain everything before continuing on with any more stuff I'm planning on showing you.

DIY'ing overload,
Angelique :D

Herbal Remedies for Beauty

Wednesday, 19 September 2012

Photo: iStockphoto/Thinkstock


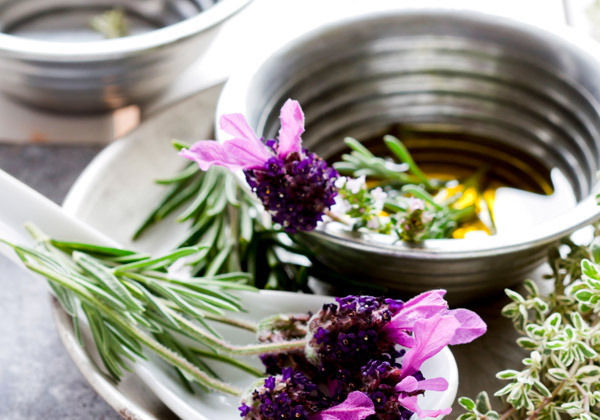
DIY beauty ingredients are everywhere, including your backyard! From the greenhouse to the pantry, natural herbs, essential oils and tea can do wonders for your complexion! So turn on some music, light some candles, and check out these garden-grown DIY beauty ideas to remedy your mind, soul, and skin.


iStockphoto/ThinkstockChamomile

Chamomile tea isn't just comforting to sip on, it works to soothe inflamed skin, too! Rather than drinking your tea, soak a cotton face towel in the liquid, then press it gently to your face before applying (or even after) a mask. The herb will work to calm inflamed skin and leave your complexion looking radiant!


F2online/Thinkstock


Rosemary

This sweet-smelling herb won't just season your cooking, it’s an acne-fighting power player! Rosemary helps to tighten skin, contains anti-fungal and antibacterial properties to help prevent breakouts, and is full of antioxidants to plump and brighten your skin.


TongRo Image Stock/ThinkstockGreen Tea

Who doesn't love green tea? This delicious beverage is the perfect substitute for coffee, and helps to de-puff your skin. Place a green teabag (after using it!) under eyes to prevent and decrease puffiness and dark circles.


Stockbyte/ThinkstockMint

iStockphoto/ThinkstockYou may prefer your mint in a tea or refreshing summer cocktail, but have you ever thought of applying it to your face? Mint has been used to treat skin conditions for hundreds of years, and its antibacterial properties are perfect for eliminating blocked pores and pimples. Simply crush a handful of mint leaves in a mortar and pestle (or blender) until they become a paste, and massage them into any areas of concern.


Lavender

Lavender is not only incredibly calming, (sprinkle a few drops of oil onto your pillow to help you drift to sleep!) it's also one of the most popular herbs in beauty products. For the perfect DIY face steam, fill a bowl with boiling water and add two to three drops of essential lavender oil. Place a towel over your head and the bowl, and let the steam open and purify clogged pores.


I've personally tried all of these remedies and they are certainly tried and tested.  With beauty products getting so expensive lately, working on cheaper alternatives is a must!  Try some of these tips, they really work!

Let me know of your tried and tested beauty tips.

xoxo,
Angelique


Recipe: Mini Banana Split

Tuesday, 18 September 2012


Morning beauties!

I'm loving the kitchen again lately and decided to share another great little easy recipe that I found on the internet lately.  It is something that anyone can make, even if you are not really great at cooking or baking!


These mini banana splits look soooo delicious!  My family love having desserts, but forking out for cakes and frozen desserts can cost sooo much!  Not only that, but it is definitely not healthy.  These mini banana splits are offering you the best from both worlds, being sweet and delicious but small in calories (only if you eat one or two!). 

Follow this easy picture tutorial to make your own:


Using a melon ball scooper, carefully scoop out middle of a banana - avoiding scooping out the sides or bottom.
Spoon in your favourite flavour of ice cream (my favourite is rum and raisin).  Carefully remove the skin of the banana.
Dip the bottom of the banana into melted chocolate and sexy sprinkles!  Haha
Top off with a small squirt of cream on the top and a gorgeous red glazed cherry to finish the look.  Et voila!


I hope you've enjoyed this little recipe and share it with your friends.  It is great for entertaining friends and family but also fab for those naughty moments when you just fancy something sweet.

xoxo,
Angelique

How to save money on beauty products

Friday, 10 August 2012

When it comes to my beauty routine, I've been in a saving sort of mood lately. It's not that I won't splurge on big-ticket items, but, more that I'm pretty beauty savvy and know a trick or two. So I figured the least I could do is share a couple hints to help you smarten up too. At the very least, you'll have an extra buck or 500 for a new pair of shoes.


Get crafty: For mascara, buy a department store brand with an amazing wand (it's all about the wand.) I like Lancome Defincils Pro Mascara, £21. Then, when it's used up, save the wand and use it with a cheaper, drugstore mascara. The truth is, most mascaras are made with the same ingredients, so they don't really vary all that much. But having an amazing wand can make a major difference to your lashes.

Try travel size tools: If you've been dying to buy a pricey tool like a rotating facial brush or high-end tweezers, buy the travel size versions instead. Yes, they are a smidgen smaller, but they do the same job for much less money.

Double up on products: Even though it's tempting to get them all, you really don't need every product out there. You can get away with using your face cream as an eye cream and your body lotion as a foot cream -- things like that. Not only is this a good tip if you're trying to save some dough, but it's also helpful when you're a girl on the go and need to pack lightly (always a challenge).

Be thrifty: Cut cotton balls in half. They are usually made larger than actually needed. So tear 'em in half and double the life of yours. That also means fewer trips to the store.

Score free products: Follow brands on Twitter and visit sites that give away beauty loot. I'm also fascinated by "Extreme Couponing" (a reality show that demonstrates how much you can save if you just use your brain -- and some scissors) and it prompted me to sign up for the rewards programs at Rite Aid, CVS and Duane Reade. Clubs like that are a great way to get free coupons and other money-saving certificates.

Those are my money saving tips. Now, when I feel compelled to splurge, these are the items I'll be buying:
Nars Sun Kissed Gift Set (Includes Medium Pore Refining Primer, Laguna Illuminator and Mini Hungry Heart/Desire Blush/Highlighting Blush Duo) - £35 


Nars Eye Liner Stylo (4 shades) - £19


Thank you so much for all your wonderful support over this past week.  Let me know what products you are looking forward to purchasing in the next few months.

Have a wonderful weekend filled with fun!

xoxo,
Angelique


FREE BLOGGER TEMPLATE BY DESIGNER BLOGS